Healthy Vegan Lemon Cake (Gluten-free Option)
Vegan Lemon Cake made with healthy wholesome ingredients. This cake is so fresh and lemony and the perfect sponge texture. It is light, low-fat and made with only 8 ingredients! You can also make it gluten-free.
Servings: 9 slices
Calories: 226kcal
Ingredients
- 1 1/4 cups + 2 tablespoons (176g) whole wheat pastry flour, not plain whole wheat (SEE NOTE at bottom for GF)
- 9 tablespoons (90g) brown rice flour
- 1 tablespoon (8g) cornstarch
- 1 1/2 teaspoons baking soda
- 1/2 teaspoon fine salt
- 1/2 cup + 2 tablespoons (200g) pure maple syrup
- 1/2 cup (120g) fresh lemon juice and zest of one large lemon (about a tsp)
- 1/2 cup (120g) unsweetened applesauce
GLAZE
- 3/4 cup (114g) powdered sugar
- 1 tablespoon (15g) fresh lemon juice
- 1 tablespoon (15g) water or milk
NOTE
- Always use a scale for accuracy when baking, following my gram weights listed, it will make a difference, especially since we all measure differently with cups. You will not need cups, just the scale and bowl, as you do not need to compare cups to weights. Make sure to hit zero in before adding each ingredient and for teaspoon amounts, just use the spoons.
- I use this scale.
NOTE
- Since this cake is so low-fat, the glaze on top is CRUCIAL to the cake, moisture and overall texture and result, so don't leave it off. It also balances the flavor since the cake is quite tart and not real sweet.
Instructions
- Preheat an oven to 350°F (177°C) and spray an 8x8 square baking dish with nonstick spray and place a square piece of parchment paper on the bottom. Have your pan ready BEFORE you make the batter because you will want to put it in the oven right away because it is a bubbly batter and the baking soda starts working immediately once the liquids hit the dry.
- To a large bowl, add the pastry flour, brown rice flour, cornstarch, baking soda and salt and whisk very well.
- To a medium bowl, combine the maple syrup, lemon juice and zest and applesauce and stir until mixed.
- Make a well at the bottom of the dry ingredients and pour the liquids into the large bowl. Now, gently and slowly, use a large spoon to mix the ingredients around the bowl and from the bottom, being very careful to be gentle and mix just until it is mixed and smooth. Do not over-mix or worry if it's slightly lumpy, as long as the flour is mixed in. You will notice how light and fizzy the batter gets from the baking soda and lemon juice working. This is what yields a fluffy cake. If you over-mix it, it can make the cake more tough/chewy and the middle sink, especially since it is a low-fat cake.
- Pour the batter gently into the dish and lightly spread out the top. Pick it up and jiggle it a bit to smooth it out. Immediately put in the oven and bake for 22-25 minutes until a toothpick is clean from the center. Mine was perfection at 24 minutes.
- I know it's hard, but allow the cake to cool 45 minutes. This will allow it to finish cooking and cool before adding the glaze.
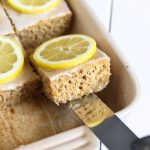
- Once the cake has cooled, make the glaze by adding the ingredients to a small bowl and whisk very well until smooth. If your sugar is really lumpy, use a strainer to break up the lumps. Pour the glaze over the middle of the cake and smooth it out over the top. I like to pick up the pan and gently tilt it side to side until the glaze naturally covers the whole surface. Allow it to soak into the cake for about 10 minutes or so, this will help add more moisture, which we need and want since it is low-fat. Then you can place it into the fridge to speed up the firming of the glaze for a few minutes. Slice and top with pretty lemon slices if desired for presentation!
- Keep the cake covered and stored at room temperature to retain it's moisture best, but it does ok in the fridge.
Notes
- GLUTEN-FREE OPTION: To make this gluten-free, sub the pastry flour with superfine oat flour, but with 1 1/2 cups (192g), 6 tablespoons (60g) brown rice flour and add an additional 2 tablespoons of cornstarch (so, 3 tbsp total, 24 grams) and all the rest of the ingredients are the same. Please note that this version is not as light or fluffy and a bit more dense, but still really delicious! Also, spelt flour works well in place of the pastry flour also, just use the same weight amount. Just make sure the center toothpick is fully clean and let it cool a full hour, as oat cakes are a better texture the longer they cool. Only use this version if you are allergic to gluten, since the above version is best.
- My BEST Vegan Lemon Cake (using regular white flour and only 6 ingredients!)
- My Best Gluten-free Vegan Lemon Cake (soft, fluffy and a reader favorite)
Nutrition
Serving: 1slice | Calories: 226kcal | Carbohydrates: 51.7g | Protein: 2.8g | Fat: 0.7g | Sodium: 345mg | Fiber: 2.7g | Sugar: 27.4g