Gluten-free Vegan Pie Crust (Oil-free!)
This Gluten-free Vegan Pie Crust is so easy to make in just about 15 minutes prep, is also oil-free, crispy and bakes up similar to a wheat crust. An easy healthy pie crust to be used for baked pies or no-bake pies!
Servings: 1 9 inch pie crust
Calories: 168kcal
Ingredients
- 1/2 cup (80g) white rice flour (not brown or the sticky "sweet rice flour")
- 1/2 cup (64g) superfine oat flour (I use Bob's Red Mill)
- 6 tablespoons (48g) tapioca starch (this starch is crucial for binding)
- 1 tablespoon (9g) ground flaxseed
- 1/4 + 1/8 teaspoon fine salt
- 3 tablespoons (45g) canned "lite" coconut milk, shaken well first
- 3 tablespoons (60g) pure maple syrup
- 1/4 cup (64g) roasted runny/drippy creamy almond butter (SEE NOTES)
- 1/2 teaspoon vanilla extract
NOTE
- I recommend highly to use a scale to prevent room for error. You don't need cups or to compare the weights to cups, just simply follow the weights listed, as this is exactly how the recipes are tested and made. Make sure to zero out before adding each ingredient.
- I use this scale
Instructions
- Lightly grease a 9 inch pie dish and set aside.
- Add the rice flour, oat flour, tapioca starch, flaxseed and salt to a large bowl. Whisk well.
- In a separate bowl, mix the coconut milk, syrup, almond butter (or sunbutter if using) and vanilla and whisk well until completely smooth.
- Pour the wet ingredients over the dry and stir together until a shaggy, rough mixture comes together. It will seem really crumbly and dry at first, but keep mixing and pressing the mixture together with the back of the spoon for several minutes. At this point, I like to use my hands to really press this mixture together, with any loose pieces, and form it with my hands. Massaging it, as a ball, in my hands for several minutes causes the moisture to all even out and become cohesive, so be patient with it. See photo for reference.
- Place the dough onto a clean surface and knead it anymore if needed so that it's completely smooth.
- Place the ball onto a large piece of parchment paper and place another piece of paper over the ball and roll out roll out into a round shape an inch or so bigger than your pie dish, about 10-11 inches. The dough should be about 1/4 inch thick. Don't roll it too thin or it'll break.
- Peel off the top piece of paper. Carefully lift up the bottom piece with the rolled out dough and very quickly flip it over onto the prepared pie dish. It is normal if it breaks in a few places.
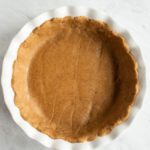
- Press the dough into the pie dish, piecing together any loose pieces. I used dampened fingers to press and seal any pieces. You want them without cracks, so it bakes up cohesively.
- Go around the edges and smooth the tops and press for a decorative design and so the thickness is similar all the way around the top. Don't worry about it looking perfect.
- If using this crust for a recipe calling for a prebaked crust for a pie that won't be baked, like my Vegan Chocolate Cream Pie, then use a fork to prick the bottom of the pie crust all over. This prevents the crust from puffing up and breaking apart.
- Bake it at 350°F (177°C) for 15 minutes until light golden brown on the edges. Cool completely before adding the filling. If using it for a recipe calling to NOT prebake the crust, like my Best Vegan Pumpkin Pie, then add your pie filling to the unbaked pie crust and bake as your recipe calls for. Keep an eye on the crust during baking and if it's browning too quickly, add foil strips or a pie crust protector.
Notes
- NUT ALLERGY: Make sure you are using a really runny/drippy roasted almond butter and not a thick, stiff one, otherwise the dough will be dry and not come together. I use either my homemade (cooled) almond butter or the Trader Joe's has a great runny almond butter. If you are allergic to almonds, you can try sunbutter in its place. This will yield more of a sunflower taste, so keep that in mind, but it will perform the same in baking.
- STORAGE: If wanting to make this pie dough a few days in advance, just follow the directions up until forming the ball. Wrap the ball in plastic wrap and keep in the fridge. Take it out 15-30 minutes or so before using. It should be soft and easy to roll. This will depend on how long you stored it in the fridge.
Nutrition
Calories: 168kcal | Carbohydrates: 26.2g | Protein: 3.5g | Fat: 5.4g | Saturated Fat: 0.8g | Sodium: 98mg | Fiber: 2.4g | Sugar: 5.1g