
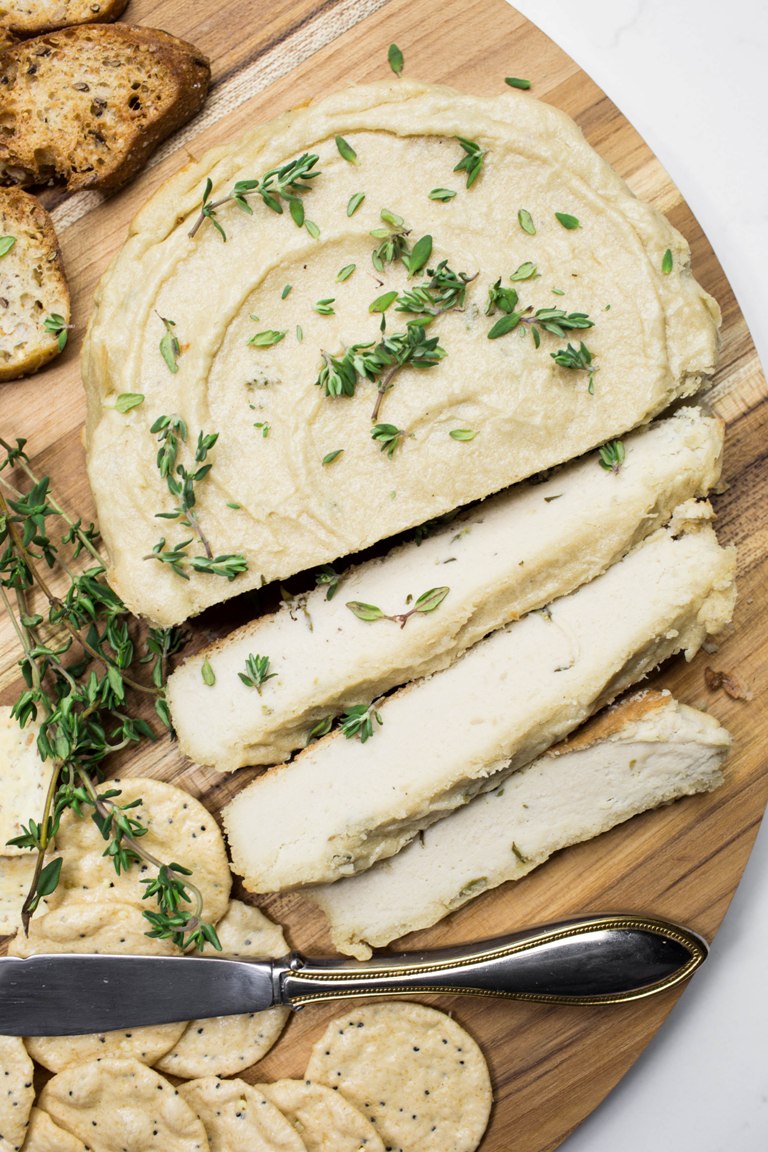
A Vegan Baked Herbed Cashew Cheese made with whole ingredients, fresh thyme, easy and simple methods for a tangy, cheesy and healthy baked cheese. It slices, it spreads and it is completely dairy-free and oil-free!
Just like with this Vegan Baked Smoky Cashew Cheese, we are using the same cheese base, but adding fresh thyme and changing a couple of ingredients instead. If you don’t like thyme, feel free to sub in rosemary, sage or basil. Whatever you like!
HOW DO YOU MAKE VEGAN CASHEW CHEESE?
This incredible blend I came up with is cheesy, super tangy, rich, depth-of-flavor and NO oil and NO nutritional yeast.
You only need 6 ingredients (+salt/water) for your vegan baked cashew cheese:
- raw cashews
- vegan worcestershire sauce (this can be found at Sprouts or Whole Foods or on Amazon)
- rice vinegar (this is the magic here!)
- lemon juice
- fresh garlic cloves
- fresh thyme or herb of choice

First, you will soak your cashews overnight. Drain and then add all of the remaining ingredients to a food processor. Process until completely smooth and not gritty.
Spread the cheese mixture into a 6 inch round cake pan lined with parchment paper. Bake at 325°F for 35 minutes until firm and just beginning to crack.
OR, bake it for 25 minutes for a more soft-style spread for bread and crackers.
Cool about 15 minutes, then slice and serve. It is heavenly warm and you can also chill it in the fridge if you like. It is delicious any way you serve it.

The cool thing about this cashew cheese? It can be sliced, will stay firm at room temperature indefinitely AND it also spreads like a cream cheese! And NO WEIRD ingredients like agar agar or starches or thickeners etc. that are hard to find. I wanted this to be easy and simple!

This cheese is amazing both cold straight from the fridge and also added to bread, then toasted. SO GOOD.

I hope you all really love this Vegan Herbed Baked Cashew Cheese as much as we did, be sure to come back and let me know!

Vegan Baked Herbed Cashew Cheese
Ingredients
- 1 1/2 cups (225g) raw unsalted cashews, soaked overnight, DO NOT SKIP THIS STEP
- 2 1/2 tablespoons (37g) plain rice (not seasoned) vinegar, please do not sub with another vinegar! (SEE NOTES at bottom)
- 1 teaspoon vegan worcestershire sauce, I use the Annie's brand, it can be found at Sprouts or Whole Foods, etc.
- 2 tablespoons (30g) fresh lemon juice
- 2 tablespoons (30g) water
- 2 garlic cloves, roughly chopped (if you love garlic, choose big or choose small for a mild flavor)
- 3/4 teaspoon fine salt
- 1 tablespoon fresh thyme leaves or herb/s of choice
Instructions
- You will need a day in advance to make this cheese, there is no way around this and rushing it will result in a gritty cheese. Trust me on this and do not skip soaking the cashews overnight. This makes the nuts very soft and is necessary since so little liquid is used and is needed to get a creamy consistency.
- Add your cashews to a bowl and pour boiling water over them by at least an inch at the top. Cover and leave to sit overnight on your counter or 8 hours minimum. Drain them and rinse them well.
- Preheat the oven to 325°F (162°C). Line a 6 inch round cake pan with a large piece of parchment paper (see photo) and press it inside the pan and against the sides to make it flat as possible.
- Add the soaked/drained cashews to a food processor. Add the rice vinegar (see notes below if doing a baked version for the vinegar amount), worcestershire sauce, lemon juice, water, garlic and salt. This will not work in a blender, I'm sorry, there is too little liquid and it will never get smooth enough because of the lack of space to go around. Process the mixture for around 30 seconds, scrape down the sides and then blend again for a solid 5 minutes or so until 100% silky smooth and creamy and NO bits of cashews remain. It should be dreamy smooth like the photos. Do not stop processing until it reaches this stage and scrape the sides as needed.
- Stir (do not blend) in the thyme leaves or herb/s of choice.
- This cheese is delicious unbaked too and after chilling in the fridge, will resemble a cream cheese style consistency. So, you can always do that and not bake it as well if you like. The flavor is tangier raw, versus baked, but both ways are delicious!
- Scrape all of that yummy cheese mixture into the pan, making sure to get it all out and spread out evenly to the sides and smooth the top.
- Bake for 35 minutes for it to be firm and slice-able as pictured. I would advise not going any longer or it can get dry and crumbly. It should just be beginning to crack at the top and be firm.
- OR, bake it for 25 minutes for a more soft-style spread for bread and crackers.
- Cool 15 minutes and then slice and serve warm. Or, you can chill it in the fridge first. I found that I liked it both ways.
- The end result is cheesy, super tangy, rich and a wonderful depth-of-flavor. I love to add slices the next day from the fridge, put on bread and then slightly toast it. SO GOOD. It would also be awesome topped onto hot soup at serving!
Notes
- Prep time does not count soaking time.
- To make this a more mild cheese, reduce the vinegar to 1 1/2 - 2 tablespoons (I used 1 1/2 tablespoons), taste after blending to decide if you would like to add more. It is recommended to use the reduced vinegar option only if you do not bake it. Baking it helps to really mellow out the flavor. I use the full amount and prefer the flavor much more baked.
I haven’t tried the recipe yet but is there a reason to use the food processor and not a high powered blender? My food processor doesn’t do a great job of making soaked cashews creamy, there is always a rougher texture. So I’m wondering if this recipe calls for a but rougher texture or if I should just use my Vitamix?
It´s high time I left a review (I thought I had to create a speical account or I´d have done it sooner).
There is not a week that has gone by in – it must be 6 years at least – that we have not made this cheese or the smoky tomato version. It´s made being vegan so easy. Baked or unbaked, it´s beyond delicious. I love it on toast, sandwiches, with salads, or cut in cubes with olives as a kind of appetizer or after food for nibbles. It takes maximum 2 mins in our Thermomix, on 9, to blend.
Thank you so much for this fantastic recipe!
I loved the recipe! I used my Nutribullet. Needed to add 1 or 2 tsp of extra water but it turned out a great consistency.